
"What is a blog button for?"
Good question! So glad you asked.
Basically, blog buttons are made to help promote your own site on other blogs. Another reason to have a blog button is to advertise your company {such as an etsy shop}.
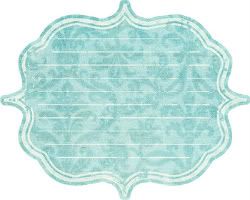
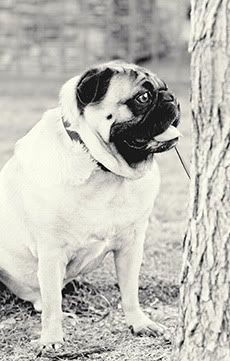
Here is my little ol' blog button; I created a few weeks ago. It's kind of simple, but I really like it.

So, are you ready to make yourself one?
Let's get started.
1. Create Your Canvas:
A typical size is 150×150 pixels, but you can make it whatever size you like. I made mine 200x200 pixels, and it was a perfect fit on the side of my blog. Just play around with the size until you find the right size for your blog. I'll share one of my little secrets with you. I didn't create the cute little canvas below. I googled "free digital scrapbooking kits," found a cute one, downloaded it, and then opened up this pretty little design in Photoshop.

2. Add Text:
Decide what you want it to say, and keep it short and sweet so that it is easy to read. Create a text box and then type your text inside.

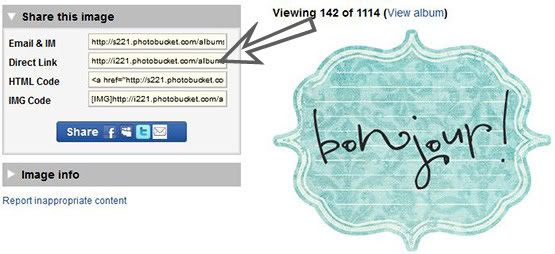
Then choose a pretty font. You can also change the color of your text if you'd like. I wanted my button simple and very easy to read, so at this point, I was done!

Note: You can also add a photo or an illustration to your button if you want a little more detail. Once you select a photo or image, place it in the box, and then play around with the words and the image until you like the way it looks. Once you are finished and like the way your button looks, save it as a .gif image. This is a very important step, because if you save it as a jpeg, it won't work.
Okay, so now that you have your button created, upload it to either Photobucket or Flickr {whichever you prefer}.
Now, let's learn how to create the box under the button with the link in it and also how to place it on the side of your blog.
Here is the code you will need:
1. You are going to replace "http://YOURBLOGADDRESS.com" in the hyperlink reference above with the URL of the webpage you want your button to link to. Make sure you put it inside the quotes.
2. Go back to Photobucket or Flickr {wherever you uploaded your button image} to get the direct link to your image.

3. You will now replace “http://YOURBUTTONLOCATION.jpg” in the sample code above with the URL to your image {the direct link you copied}. You will do this twice, as you can see there are two "http://YOURBUTTONLOCATION.jpg" in the sample above.
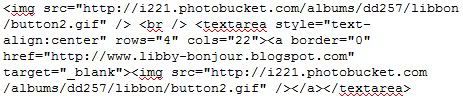
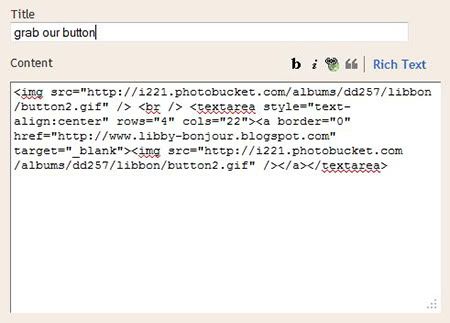
Here is an example of what my code looks like:

Now you are ready to insert your new button on your blog sidebar!
1. Go to Blogger:: Edit Layout
2. Click "Add a Gadget"
3. Add a HTML Gadget {4th one down from the top}. It should look like this:

Let's get started.
1. Create Your Canvas:
A typical size is 150×150 pixels, but you can make it whatever size you like. I made mine 200x200 pixels, and it was a perfect fit on the side of my blog. Just play around with the size until you find the right size for your blog. I'll share one of my little secrets with you. I didn't create the cute little canvas below. I googled "free digital scrapbooking kits," found a cute one, downloaded it, and then opened up this pretty little design in Photoshop.
Decide what you want it to say, and keep it short and sweet so that it is easy to read. Create a text box and then type your text inside.

Then choose a pretty font. You can also change the color of your text if you'd like. I wanted my button simple and very easy to read, so at this point, I was done!

Note: You can also add a photo or an illustration to your button if you want a little more detail. Once you select a photo or image, place it in the box, and then play around with the words and the image until you like the way it looks. Once you are finished and like the way your button looks, save it as a .gif image. This is a very important step, because if you save it as a jpeg, it won't work.
Okay, so now that you have your button created, upload it to either Photobucket or Flickr {whichever you prefer}.
Now, let's learn how to create the box under the button with the link in it and also how to place it on the side of your blog.
Here is the code you will need:
1. You are going to replace "http://YOURBLOGADDRESS.com" in the hyperlink reference above with the URL of the webpage you want your button to link to. Make sure you put it inside the quotes.
2. Go back to Photobucket or Flickr {wherever you uploaded your button image} to get the direct link to your image.
3. You will now replace “http://YOURBUTTONLOCATION.jpg” in the sample code above with the URL to your image {the direct link you copied}. You will do this twice, as you can see there are two "http://YOURBUTTONLOCATION.jpg" in the sample above.
Here is an example of what my code looks like:
Now you are ready to insert your new button on your blog sidebar!
1. Go to Blogger:: Edit Layout
2. Click "Add a Gadget"
3. Add a HTML Gadget {4th one down from the top}. It should look like this:
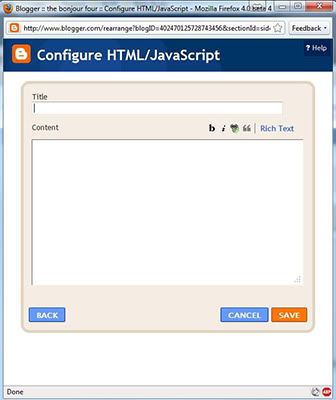
4. Now copy your code and paste it like this:

5. Click save and you should have a pretty little blog button on your sidebar. Yay!
Shoot me an email if you encounter a problem! Like always, I will be more than happy to help you figure out what went wrong.
Now go get busy and make some pretty blog buttons!

p.s. Thank you Gina for sharing the blog button code with me!
Shoot me an email if you encounter a problem! Like always, I will be more than happy to help you figure out what went wrong.
Now go get busy and make some pretty blog buttons!

p.s. Thank you Gina for sharing the blog button code with me!


8 comments:
so funny Libby because I just did a blog button tutorial also! It will post tonight at 12AM! haha. ours are a little different though because I don't have photoshop so there are different steps to mine:)
smiles,
gina
sweet tut!!! perhaps I shall make one! i have few readers on my blog!!! Thanks for stopping by and I am happy to have a fellow nurse step in on my blog for a second. I just transferred to my university of choice! A little overwhelming but I am gonna get it done!!
Oh this is a really nice tutorial! I love your blog button by the way! I don't know if I've mentioned it before, but it's so cute. I love the font! Thank you so much for showing us how to make the button! Maybe when my blog finally picks I can make one of these for myself! :)
Wow! Thanks for posting this, Libby! I've been wondering how to make one of these fabulous wee buttons! I'm working on mine right now! Eeeek!
Worked like a charm!!
Kristy- thanks soooooo much for stopping by my blog and giving me the link to your tutorial. I am going to try it right away. I found the image googling different flowers, then I altered it in photoshop. And I added the text there too. I don't know very much about photoshop, a friend gave me a bootleg copy 4 years ago, but it works for me. I'll have to try picnik too, another friend was telling me about it. If I use your tutorial for the button I'll be sure to link it back to you. Thanks again. Oh and I am your newest follower. Your son is so handsome. Have a blessed day!
Jennifer
http://www.alwaysinwonder.com
Thank you!! I have been wanting to make a button for my blog! This will come in handy. Thanks again!
Hey, I just tried to do this and my image would show up and a box would show up below it, but for some reason the code wasn't showing up in the box. Am I missing something here? Thanks!
-Jen
yourstrulyjen.com
Post a Comment