I'm drawing a blank tonight. Go figure. So, I thought I would write out a tutorial for you all. Sound good?
Tonight I am going to show you how to create a photo collage! And you will be happy to know, it's a very easy thing to do!
Have you heard of Picasa? I love this program {almost as much as I love Photoshop}. It's a great program that manages your collection of digital pictures, and it can also do some very simple editing.
I use Photoshop for most of my editing, but when it comes to creating photo collages, I prefer Picasa. I honestly think Picasa does just as good of a job creating simple collages as Photoshop. But really, the main reason I love using Picasa to create my collages is because it does all the work for me. :) I'm lazy like that.
So, let's get downloading and start playing in Picasa to create some photo collages!
Click here to download Picasa. And in case you are wondering, it is free!
Now that you have downloaded Picasa, all of your pictures on your computer should automatically load into it. Here is the getting started guide in case you have any questions about Picasa.
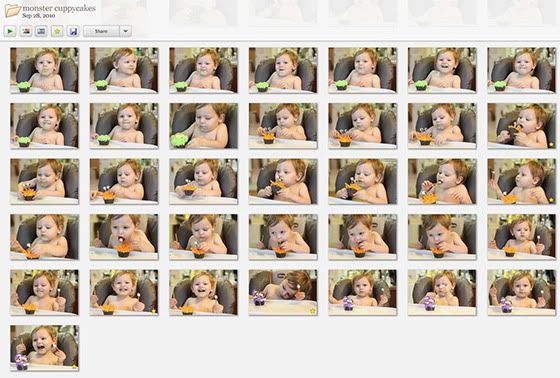
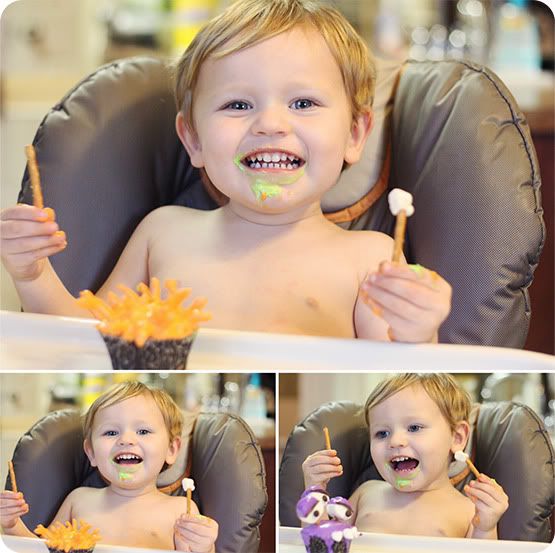
Once you are in Picasa, on the very left side of the window, you will see a list of folders. You can use these folders to organize your pictures by date or name. The folder I'm showing you below is labeled "Monster Cuppycakes." I am going to choose three pictures of Noah eating his cupcakes for my collage. You can use however many pictures you want.
First, click on a picture. After you do that, the first picture will be highlighted. Then you will hit the CTRL button on your keyboard while you click the remaining pictures.
Note: When you hit the CTRL button, don't let go of it until you finish clicking all the pictures you want to use for the collage.
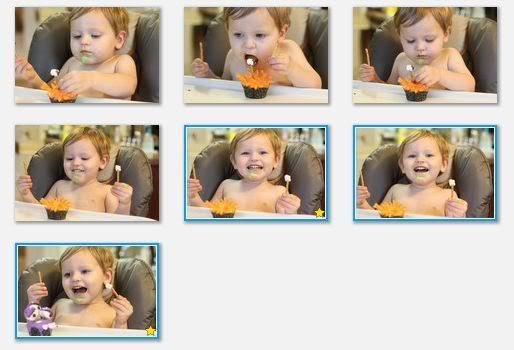
Once you finish clicking all the pictures you want to use for your collage, they will all be highlighted like mine are below. You can then release the CTRL button.
Now that my pictures {and yours!} are highlighted, we are ready to make a collage.
Above all of the pictures, you will see the folder name. Like I mentioned before, my folder name is called, "Monster Cuppycakes." You will see a bunch of buttons under the title of the folder, click the second button {right next to the green arrow}.
This is the "Create Photo Collage" button.
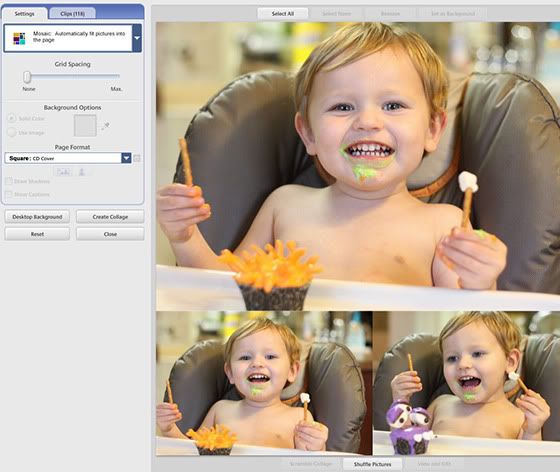
Once you click that button, it will automatically put your pictures into a collage like mine below.
On the left side of your photo collage, there is a "Settings" box. There are many options to choose from in this little box. This allows you to customize your photo collage. Play around with all of the settings. That's the fun part!
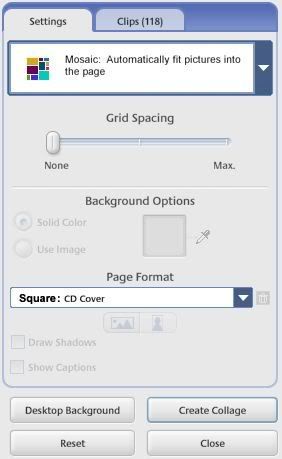
Also, under the photo collage, there is a button you can push called, "Shuffle Pictures." It randomly creates different collage layouts with your pictures, and you can click it over and over again until you like how your collage looks.
Removing and Adding Pictures to your Collage:
If you have a picture in your collage that you decide you don't want anymore, just click the picture {this will highlight it} and push the "Remove" button located above the collage.
If you want to add more pictures to your collage, click the tab "Clips" in the Settings Box. Then you can click "Get more..." and it will take you to the folders where you can pick different pictures.
Once you are done playing with the settings and you are happy with your collage, then click the button "Create Collage" which is located in the Settings Box.
After Picasa has created the collage, it automatically exports it into an image. On your computer, locate your "Pictures" folder, and find the folder labeled "Picasa." Then there should be a folder labeled "Collages." Click that folder and you should be able to find your collage there.
Then you can upload the collage to either Photobucket or Flickr {whichever you prefer}. You may need to resize your collage before you put it into your blog post. This tutorial will help you learn how to resize images if you don't know how.
Here is my finished collage!
If you have any questions, don't hesitate to leave me a comment below or send me an email. I'm happy to help!
Have fun creating your collages! I can't wait to see them.

p.s. The Hidden Cupcake Giveaway is now closed! A winner will randomly be selected and announced sometime Monday {October 11th}. Thanks to all who entered and good luck! Oh, and there is a new menu up for this week. :)







14 comments:
So great of you to write this tutorial. I also used to use Picasa a lot!! Although, for the more "complex" collages, I believe you have to have the paid membership? I'm not 100% certain. Do you know?
Thanks! I actually have no idea.. I haven't checked into that.
Love your new background, Libby! Happy Sunday!
Thanks Libby! I love using both Picasa & Photobucket! Have you ever tried Photobucket? Is Photoshop for free as well?
Chrissy- yes, I do use photobucket and love it! I actually use flickr a little bit too. They are both great sites. And no, Photoshop is not free. I wish!
I've never checked into Picasa for photo collages. Thanks for bringing it to my attention! I use photoshop for my collages and the process can kinda extensive sometimes. I'm sure you know that as well. This will definitely save me lots of time! Thank you so much, and I love your background! Very cute!
I've never tryed it before...looks like it's easy to work with! thanks so much for sharing it:)
great tutorial and what a cutie in that collage. oh and i'm so jealous...i had no idea bakerella was coming to dallas. i may have to put that on the calender!! :-)
Yay! Maybe I can do a collage soon. Will certainly try! I am soooo behind on blogs. I just need to spend this whole next weekend blogging...haha.
I am going to have to check out picasa!
Thanks! I use Picasa and have never used that tool before. will have to play around with it!
Cool, thanks for the tips!
Awesome! Thanks so much for sharing this. I always wanted to try collages but thought I would need to buy photoshop. I'll be trying this as soon as I get to my own computer :)
-Meagan
I just discovered this! What a time saver this is going to be, thanks! :)
Post a Comment